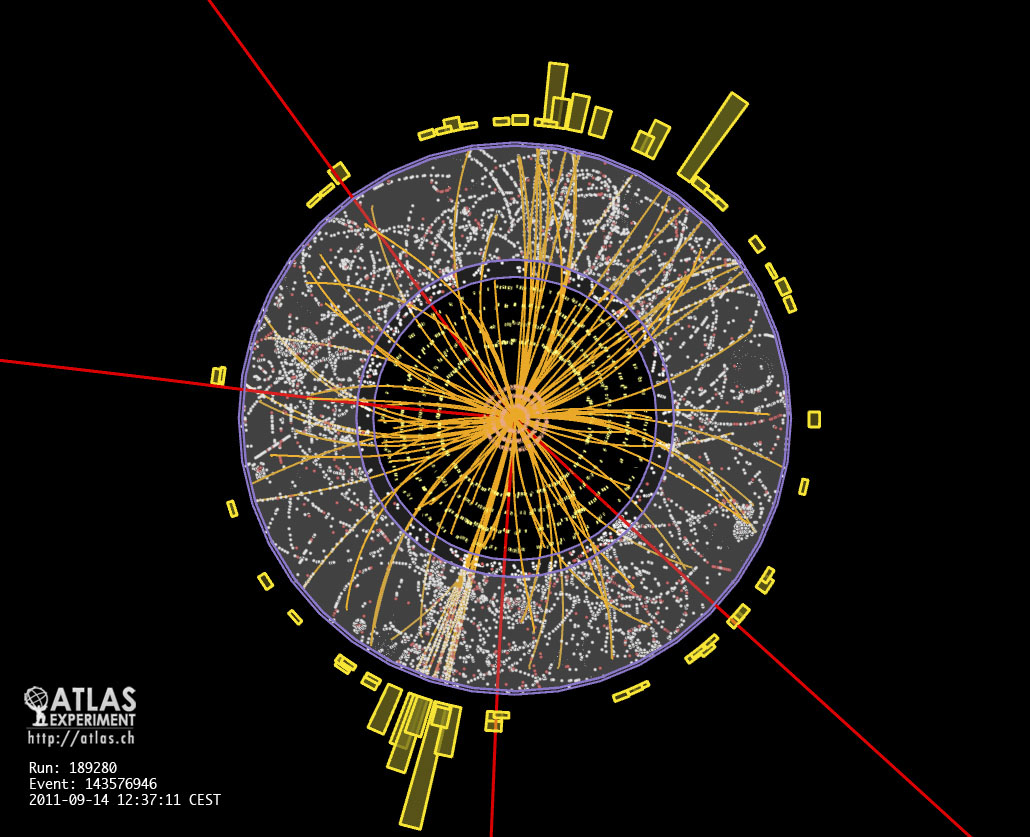
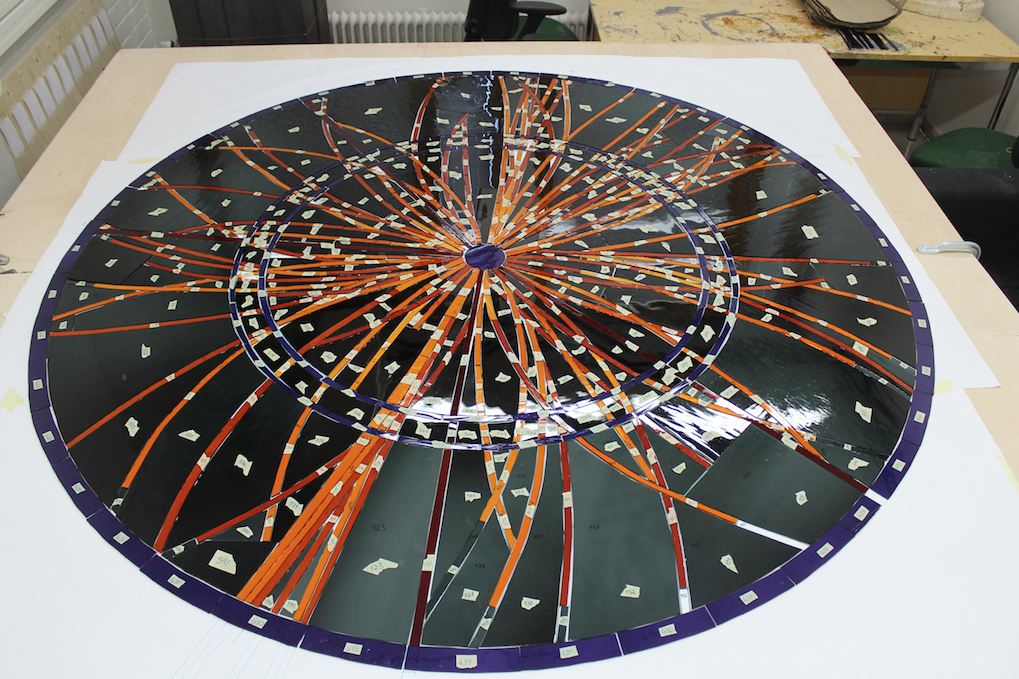
 The original visualisation on which the window design was based

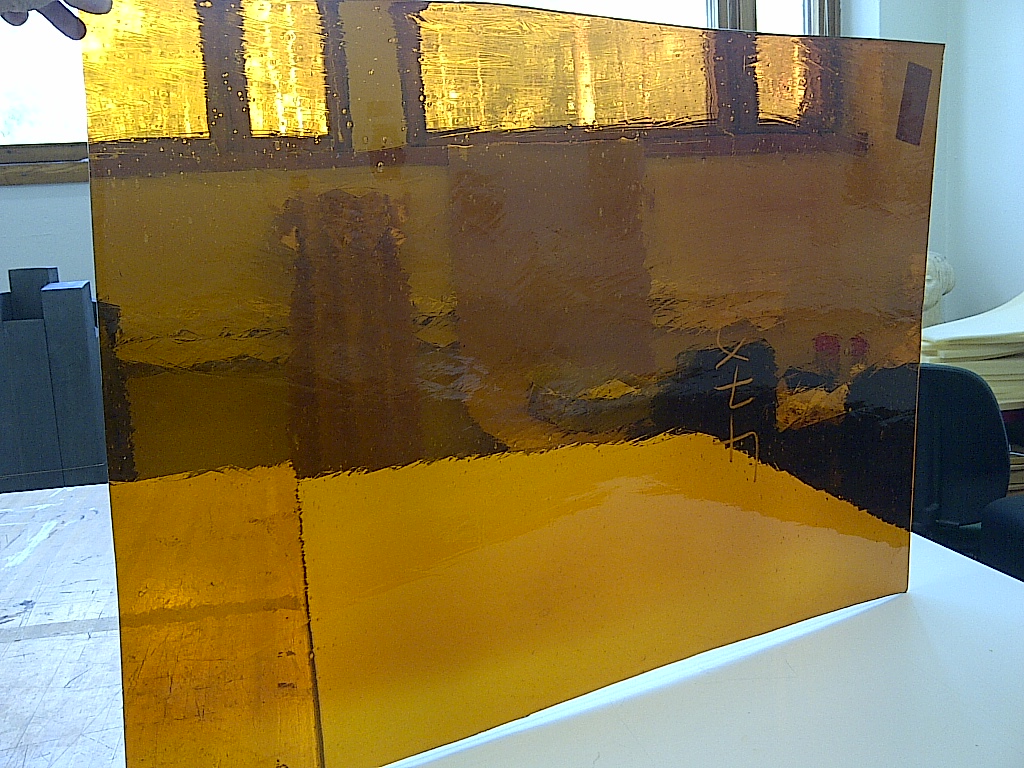
Matching glass colours
The glass is mouth-blown into long cylinders and then formed into sheets through a series of varrying-temperature ovens
Making a small test panel with the first cartoon (it did not go well at all!)
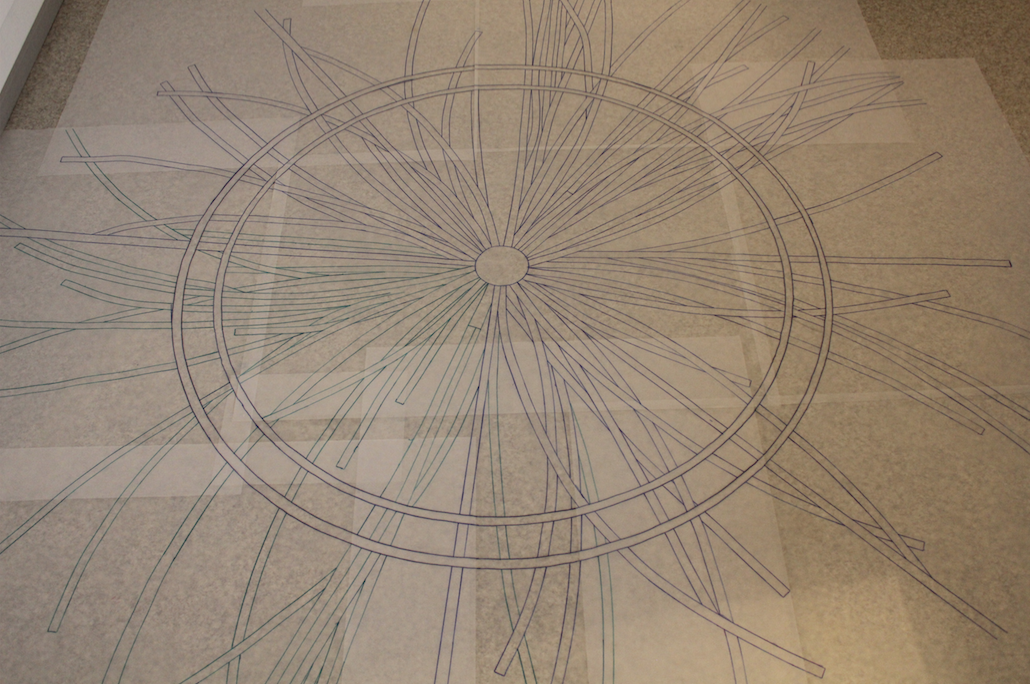
After the test panel made quite obvious that the margin of error was very small (1-2mm), I redrew the cartoon using more precise tools for greater accuracy
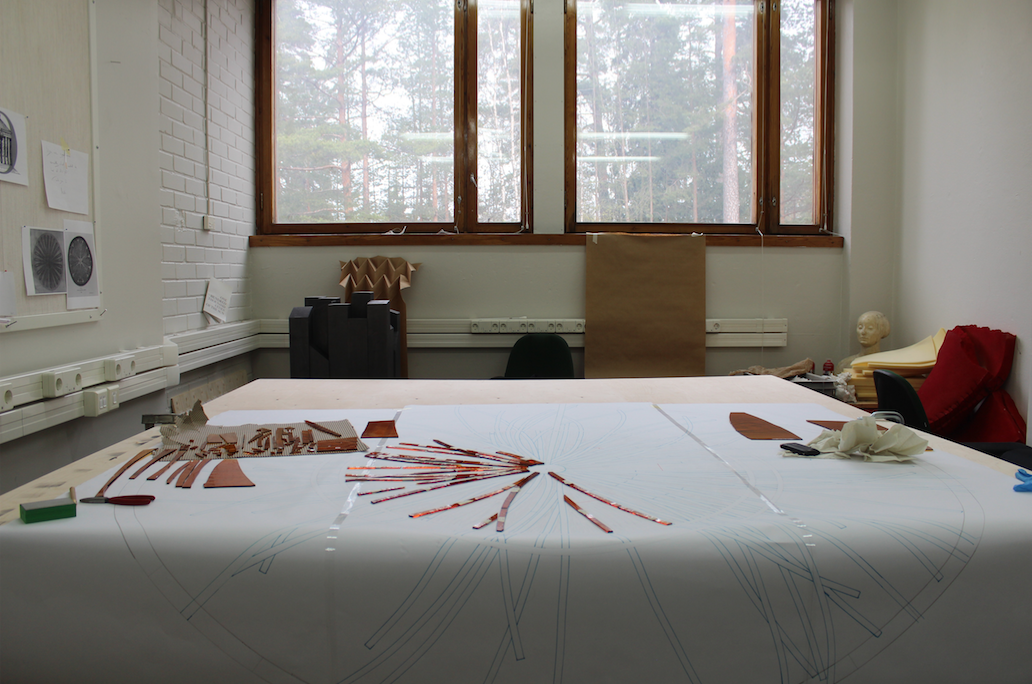
Early stages of glass cutting

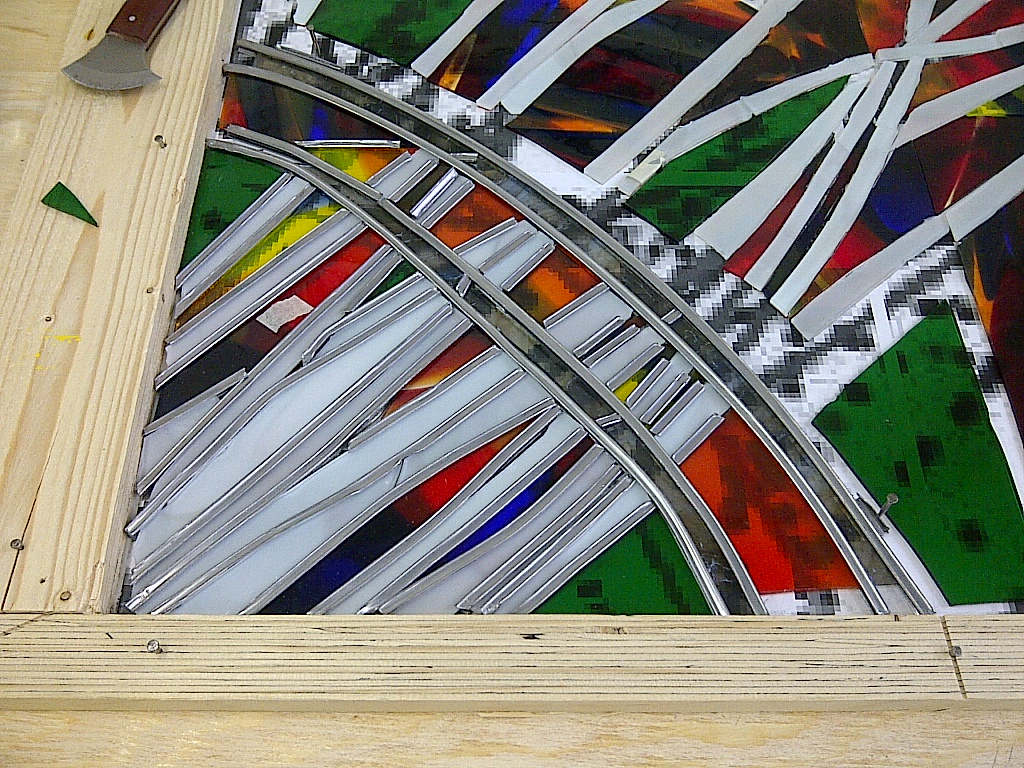
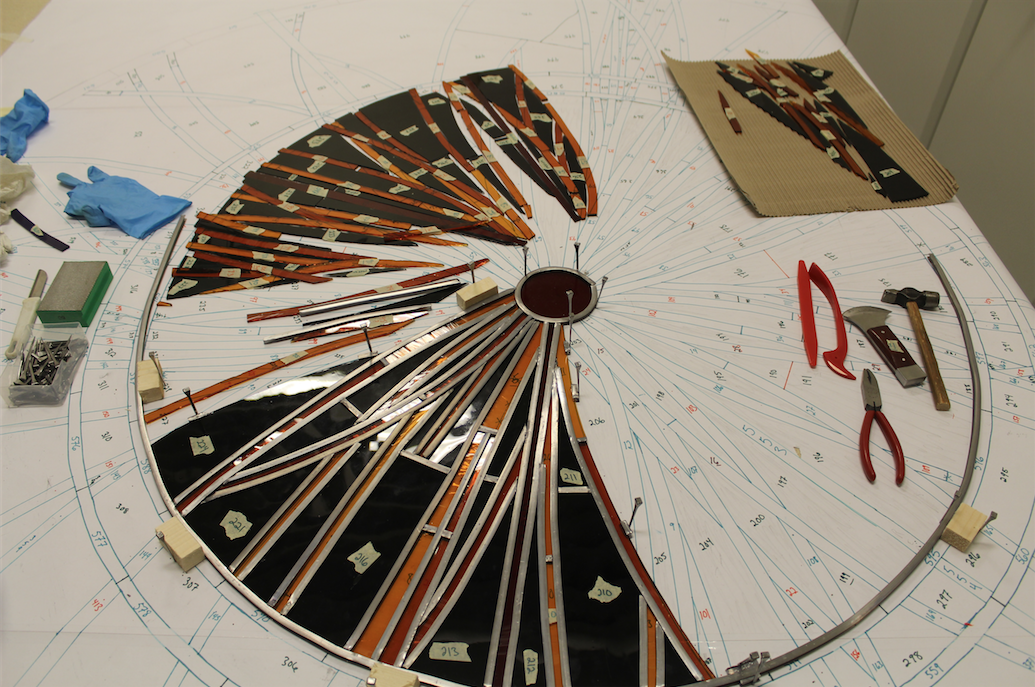
Later stages of glass cutting
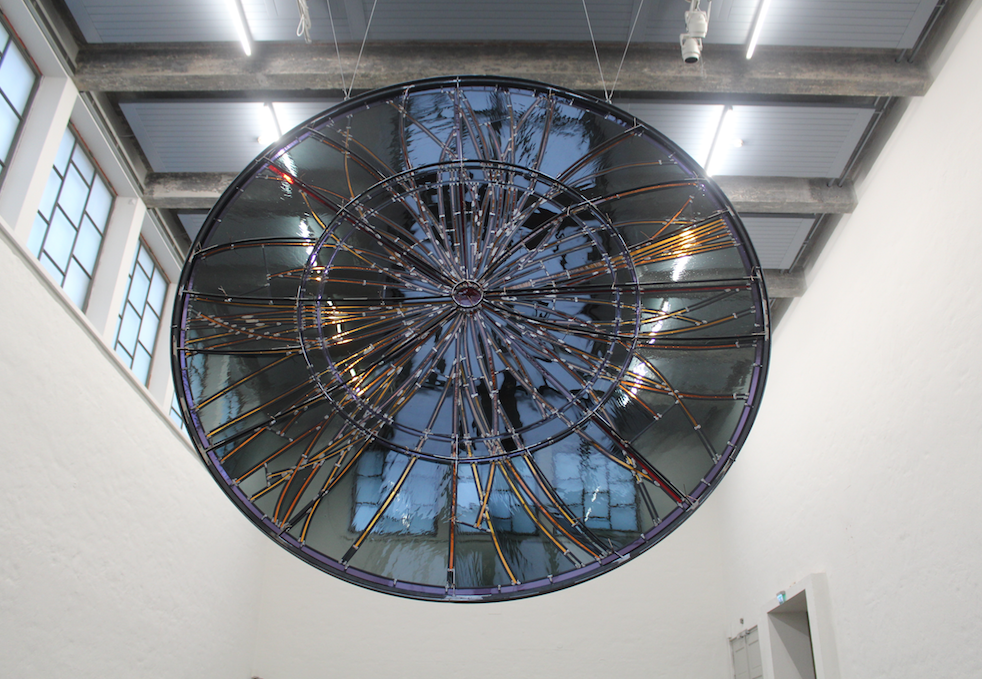
All 650 pieces of glass cut and labelled before being joined together with lead came
Early stages of leading up – the came is an H-profile which holds the pieces of glass on either side. It is later held together by soldering at each joint
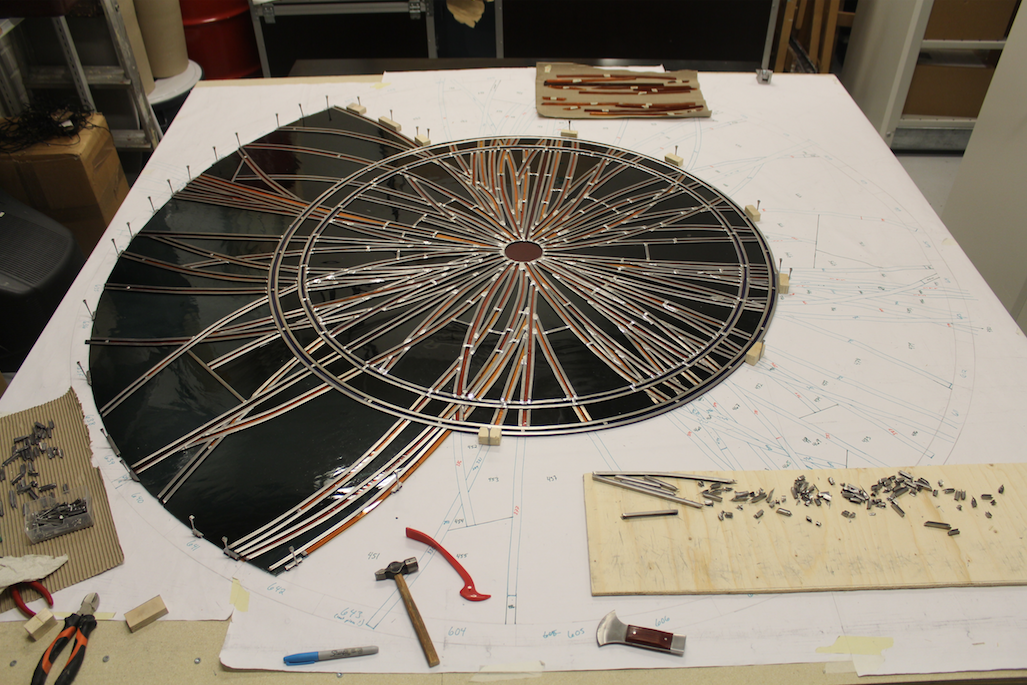
Later stages of leading up
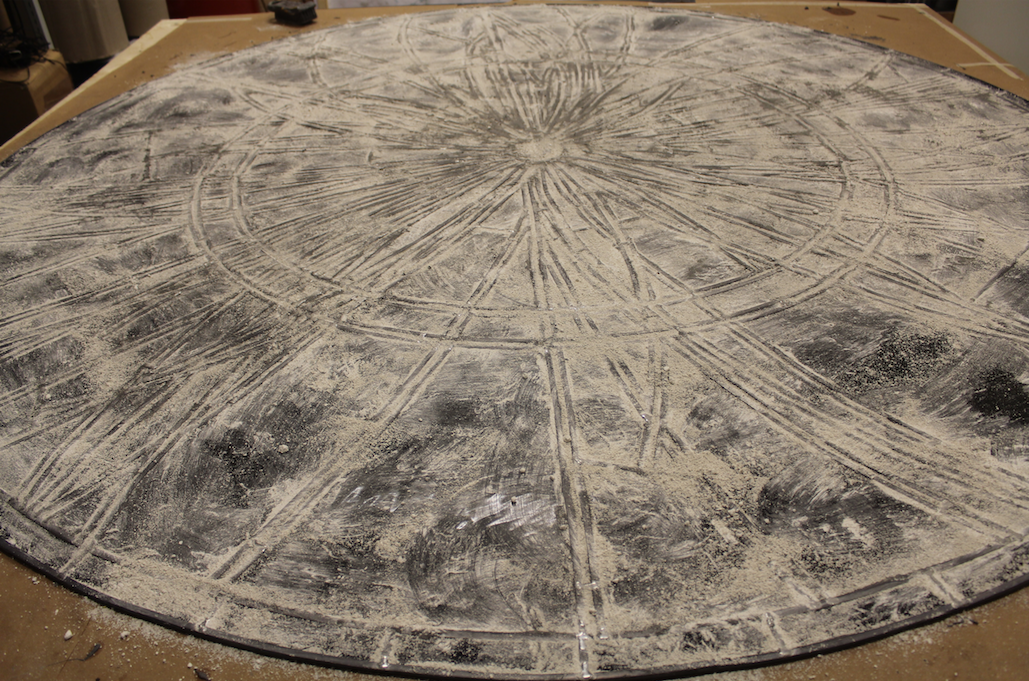
Once the window has been fully leaded and soldered, a cement-type compound of linseed oil, calcium carbonate, turps and carbon black powder is forced between the gaps in the glass and the lead. This cement helps to strengthen the window. Additional calcium carbonate is spread over the window to dry out the cement – it is later brushed off as part of the final cleaning process.
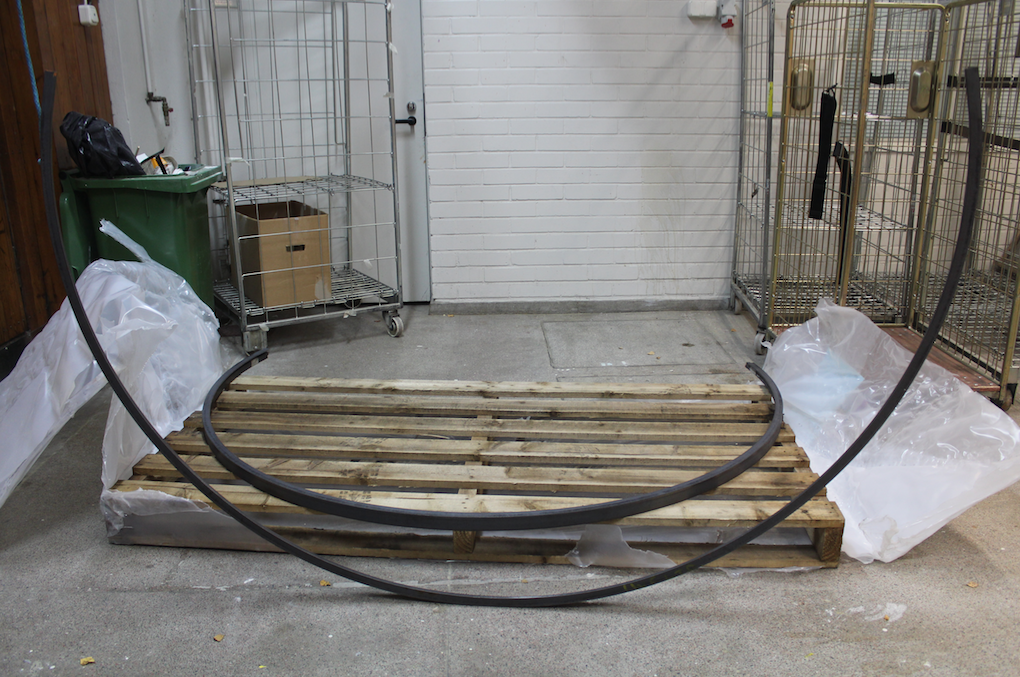
The angle steel outer frame was bent in the UK, before being shipped to Helsinki for final welding.
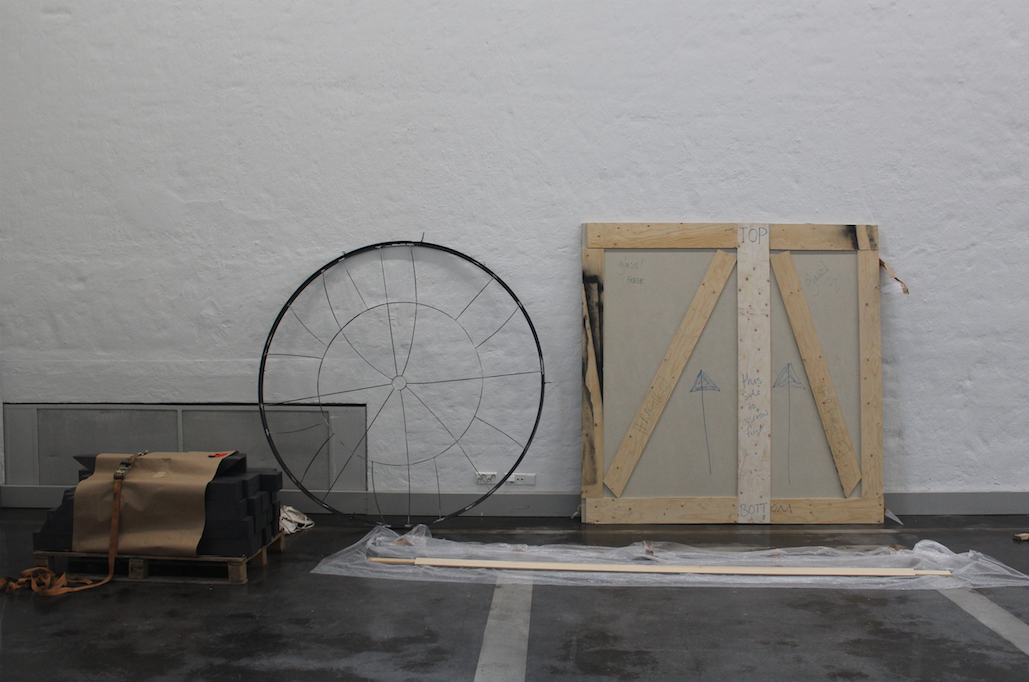
The outer frame and ferramenta – a steel internal support structure which was later tied on to the reserve side of the window – prior to installation in the Kunsthalle
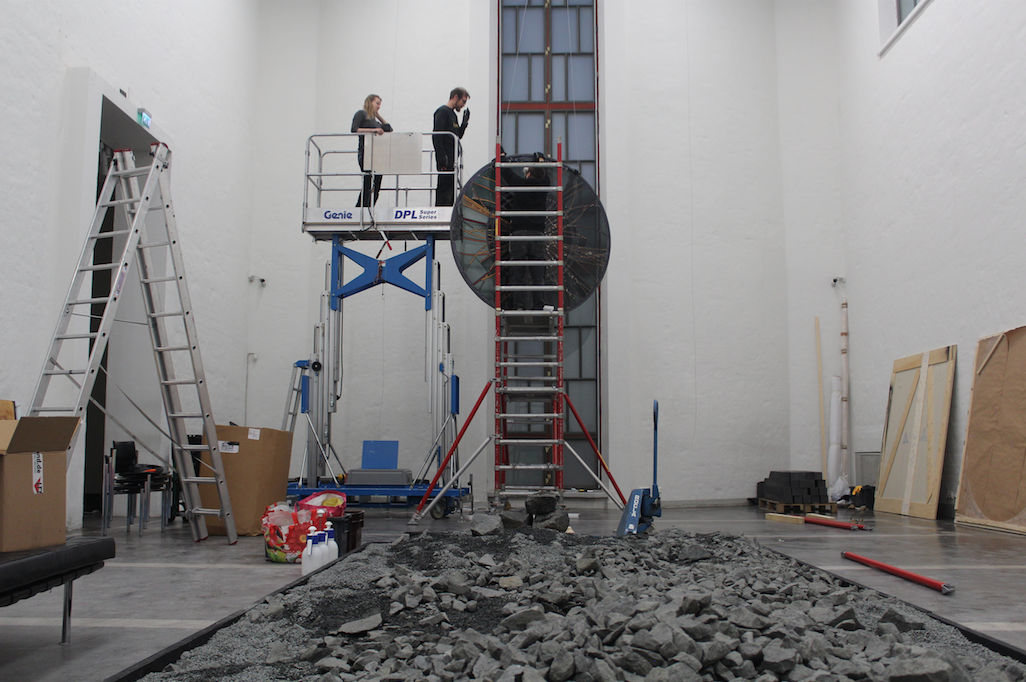
The tricky installation process…
The back of the window following installation. The ferramenta – attached with bronze wire ties – is visible from this angle.